In the ever-evolving landscape of content creation, the Gutenberg block editor has emerged as a game-changer for WordPress users. Its intuitive interface and powerful features make it a go-to tool for content creators looking to craft engaging and visually appealing content. In this article, we will explore advanced techniques that unlock the full potential of Gutenberg, revealing lesser-known features that can significantly enhance your content creation workflow.
What Is Gutenberg?
Gutenberg is the new default editor in WordPress, replacing the classic editor. It enables users to create and design content using individual blocks for text, images, videos, and other site elements through a drag-and-drop interface, providing enhanced flexibility and design capabilities.
In the WordPress community, Gutenberg not only refers to the editor but also to the broader Gutenberg project, aimed at transforming the entire editing experience on WordPress. The WordPress core team has outlined a roadmap to achieve this:
- Easier Editing: Launched with the Gutenberg block editor in WordPress 5.0, offering a more intuitive way of website building.
- Customization: WordPress 5.9 introduces website design features based on the Gutenberg interface, such as full-site editing, block patterns, a block directory, and block-based themes.
- Collaboration: Future WordPress releases may streamline the co-authoring experience.
- Multilingual: Working towards making the core software functional for websites with multiple languages.
In this article, our focus will primarily be on the Gutenberg editor, guiding you on how to leverage its capabilities.
How the Gutenberg Editor Works
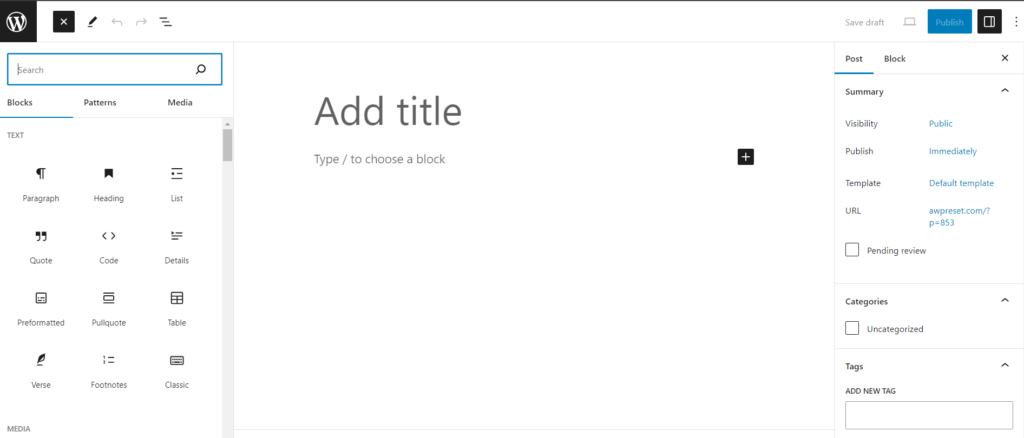
The Gutenberg WordPress block editor provides individual content blocks for users to add and edit various elements in posts and pages. Each block is a standalone component with configurable settings.
Creating content using the block editor is straightforward. On the WordPress dashboard, navigate to Pages or Posts → Add New to open the Gutenberg interface.
Click the block inserter + icon on the left to view all the blocks organized by function. Drag and drop a block into the Gutenberg editor to place it where needed.
With the WordPress block system, you can customize each block using the toolbar on top of the element or in the settings bar on the left-side panel.
For a more efficient design approach, Gutenberg offers block patterns, combinations of blocks like columns paired with images and buttons. Tech-savvy users can also create their own WordPress blocks and block patterns to share with others.
Gutenberg Editor vs Classic Editor
The transition from the previous WordPress editor to the built-in block system brought significant changes. In contrast to the block editor interface, the classic editor appears as a simple text interface, akin to an online document processor like Google Docs.
Here’s a quick comparison of Gutenberg Editor and Classic Editor:
Gutenberg Editor:
- Editor Interface: Responsive and intuitive with self-explanatory menu settings.
- Content Creation: Employs a block system, offering content creation features.
- Ease of Use: Utilizes drag-and-drop blocks, no technical expertise needed.
- Features: Includes template parts, block patterns, and design flexibility.
- Pros: Beginner-friendly, intuitive for media-rich content.
- Cons: Potential compatibility issues with older themes and plugins.
Classic Editor:
- Editor Interface: Simple text interface, similar to online document processors.
- Content Creation: Offers a blank canvas for writing posts and pages.
- Ease of Use: Similar to using Google Docs, requires some HTML knowledge.
- Features: Classic editor lacks design customizability.
- Pros: Straightforward writing environment, ideal for text content.
- Cons: Limited design flexibility and advanced features.
When navigating the WordPress editing landscape, the choice between Gutenberg and Classic Editor boils down to your preference for either the innovative, multimedia-friendly features of Gutenberg or the time-tested simplicity of the Classic Editor. Let’s explore each editor’s strengths and drawbacks to help you make an informed decision based on your content creation needs.
Mastering bloc customization
One of the key strengths of Gutenberg lies in its diverse range of content blocks. From text and images to advanced elements like tables and multimedia embeds, Gutenberg offers a block for every purpose. To take full advantage, explore the customization options within each block. Experiment with font styles, colors, and spacing to create a visually cohesive and appealing layout.
Additionally, leverage the “Advanced” settings for more fine-tuned control. Adjust block visibility, add CSS classes, or set custom HTML attributes to tailor each block to your specific needs. This level of customization allows for a unique and professional presentation of your content.
How to Add a New Block
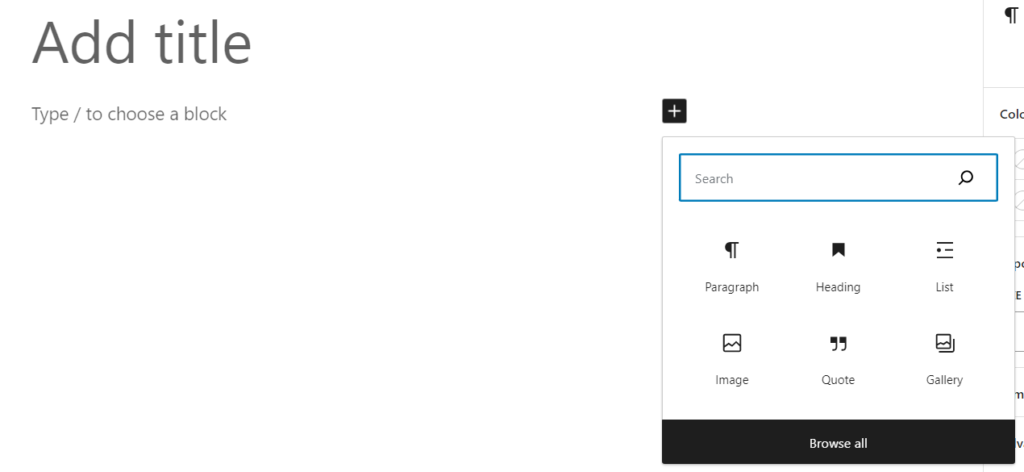
The first step is to add a new block, possible in several ways. On the Gutenberg interface, you’ll find a title block already present. Move your cursor below it and click the black + icon to select the first block to add. If the desired element is not listed, press Browse all.
Another method is through the block inserter interface, accessible via the top-left blue + button. Blocks are categorized, and a search bar helps find specific blocks.
If the block is unavailable, the inserter shows results from the Gutenberg block directory, part of the WordPress plugin repository for single-block plugins. Finally, you can add new blocks by typing slash /, then specifying the block type and hitting Enter.
Customize Blocks
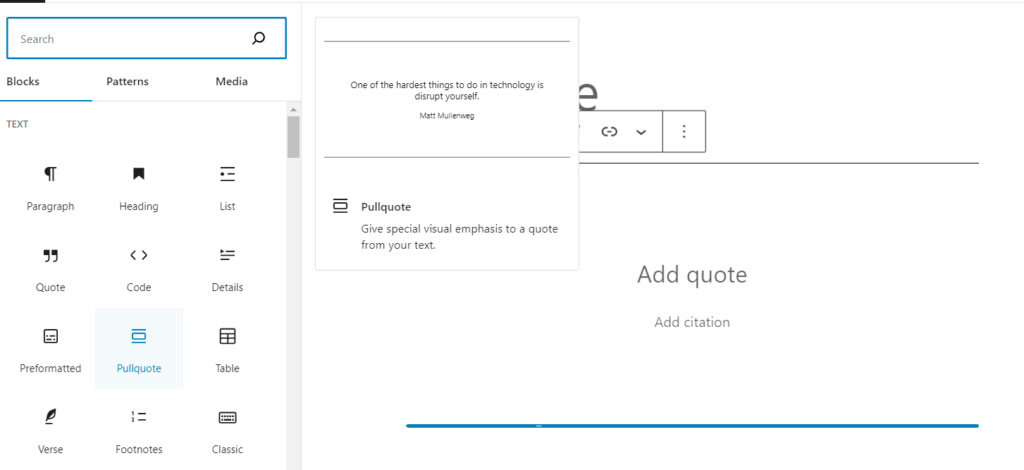
Customizing Gutenberg blocks in WordPress is simple. Clicking on any block reveals the block’s toolbar at the top. The dynamic toolbar adapts to the selected block type, offering options for customization.
Block settings, accessed through the settings icon, provide further customization options. Depending on the block, you can modify styles, dimensions, and typography. Advanced users can insert custom HTML or CSS for additional customization.
Arrange Blocks
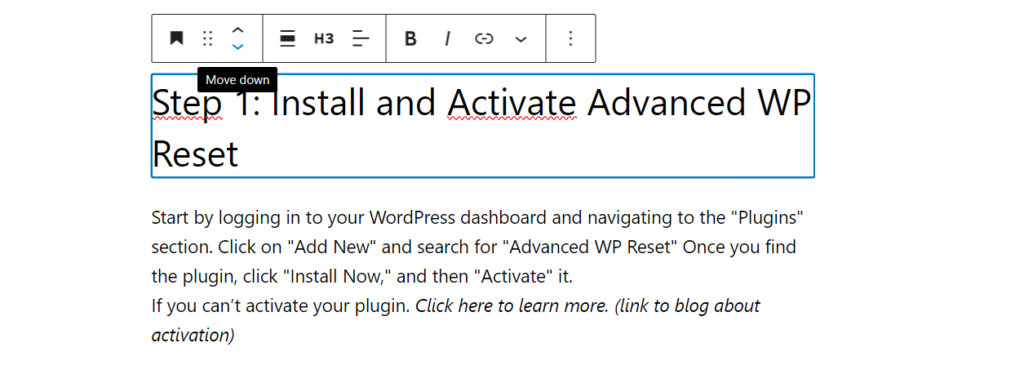
Rearranging blocks is a fundamental action in the Gutenberg editor. Click on a block, select the six-dot icon on the toolbar, and drag it to the desired position. Multiple blocks can be selected and moved simultaneously.
Group Multiple Blocks
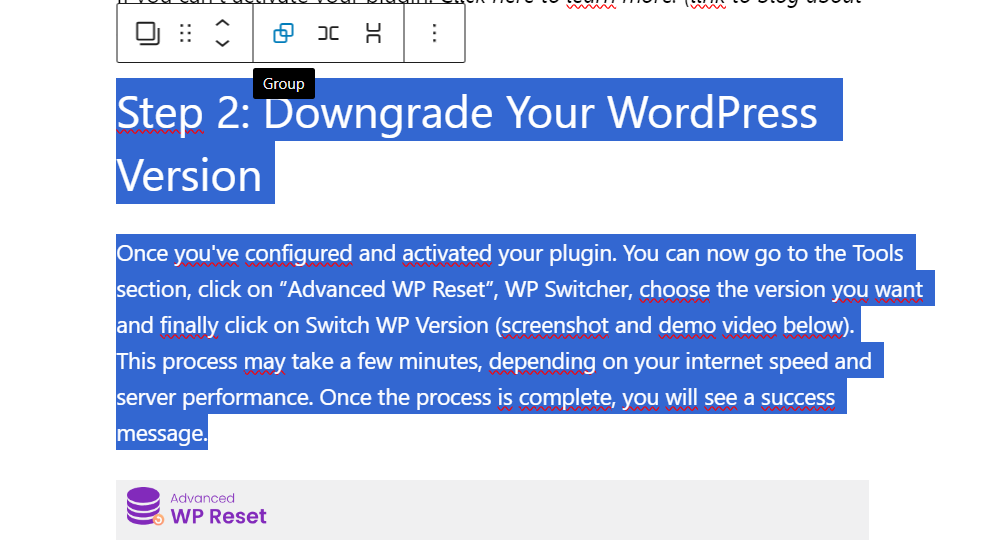
Grouping blocks is useful for managing sections as one unit. Blocks like Group, Columns, Row, and Stack facilitate grouping. These design blocks create nested blocks, with child blocks inside a parent block, forming a structured layout.
For example, grouping headings is a straightforward process that enhances organization and structure within your content. To create a group for headings, start by adding a heading block to your post or page. Once you have multiple headings in place, simply click on a heading block, and a toolbar will appear. Look for the “Group” option in the toolbar and click on it. This action will group the selected heading with its associated content. You can continue this process for other headings to create nested groups, helping you organize your content hierarchically. Grouping headings not only improves the visual clarity of your posts but also enables you to navigate and manage your content more efficiently, especially in longer articles or pages. It’s a valuable feature in the Gutenberg editor, empowering WordPress users to create well-structured and visually appealing content effortlessly.
Creating Reusable Blocks
Boost your productivity by embracing the concept of reusable blocks. If you find yourself using a particular block configuration frequently, save it as a reusable block for easy access in future projects. This feature is particularly useful for consistent branding elements, such as call-to-action buttons, quotes, or author bios. By updating the reusable block, you can instantly apply changes across all instances, saving time and ensuring consistency.
To create a reusable block, select the block, click on the three dots in the toolbar, and choose “Add to Reusable Blocks.” Give your block a meaningful name, and it will be available in the “Reusable” tab for future use.

Global style and typography
Gutenberg introduces global styles and typography settings that enable you to maintain a consistent design throughout your website. Explore the “Site Styles” panel to set default colors, fonts, and spacing for various elements. By defining these global styles, you ensure a cohesive visual identity across all your content.
Experiment with different font pairings and color schemes to find a combination that aligns with your brand. These global settings provide a quick and efficient way to update the overall look and feel of your site without manually adjusting each block.
How to Add Headings and Text
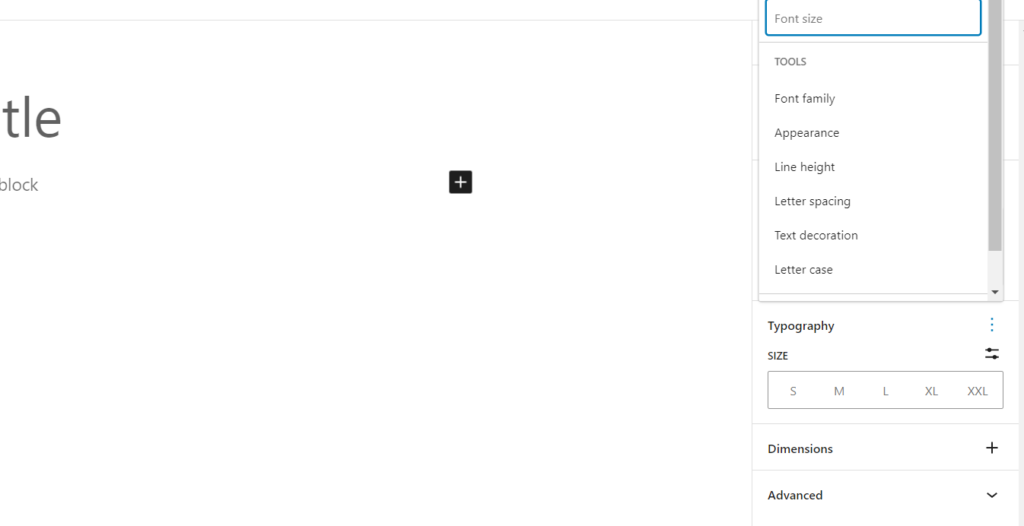
Text can be added with paragraph and heading blocks. To add a paragraph block, type directly into the Gutenberg interface or use the block inserter to select Paragraph. The toolbar and settings offer options for text alignment, styling, links, footnotes, and more.
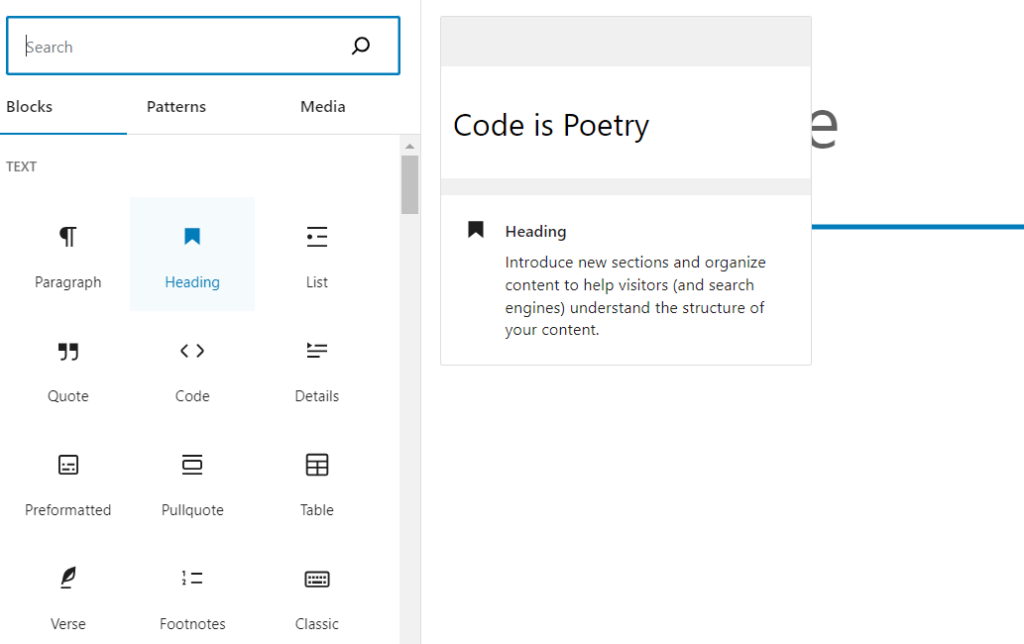
Heading blocks help structure content. Select Heading from the block inserter, then choose the appropriate heading level in the toolbar. Like the paragraph block, heading block options include text width, alignment, and other attributes.
How to Add Images and Media
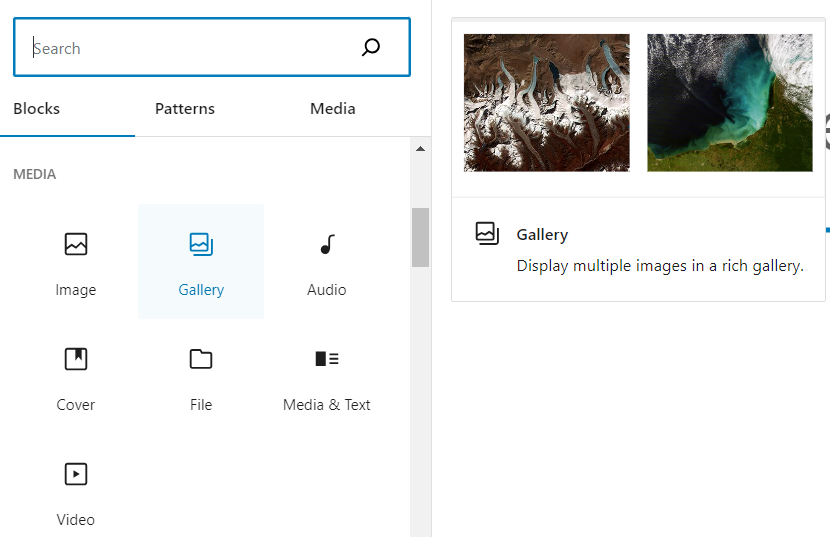
The Gutenberg editor allows insertion of various media types, including Image, Audio, Video, and File blocks. Dynamic content blocks like Media & Text, Image Gallery, and Cover offer additional options
The Gutenberg block editor continues to evolve, offering content creators a robust platform to express their creativity. By delving into the advanced features and techniques outlined in this article, you can unlock the full potential of Gutenberg and elevate your content creation process. From block customization and reusable blocks to advanced layouts and global styles, these tips and tricks will empower you to create engaging, visually appealing content that resonates with your audience. Embrace the power of Gutenberg and take your content creation to new heights.


